How to Receive WhatsApp Events with Wawp on n8n
Learn how to use the Wawp Trigger node in n8n to receive WhatsApp events like messages, reactions, and group updates. This guide covers setup, configuration, and testing.
The Wawp Trigger node in n8n is the perfect starting point for any WhatsApp automation. It acts as a webhook that listens for real-time events from your Wawp account, allowing you to build workflows that react instantly to user actions. This guide will show you how to set up the Wawp Trigger and link it to your number to start receiving events. 
Step 1: Add the Wawp Trigger Node
First, you need to add the Wawp Trigger node to the beginning of your n8n workflow.
- Open your n8n workflow.
- Search for
Wawp Triggerin the node panel. - Click on the node to add it to your canvas.
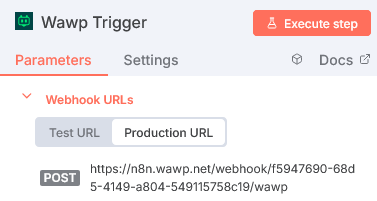
 Once added, the node will look like this. Open its settings to view your unique test and production URLs.
- Test URL: A unique link for testing your workflow.
- Production URL: The final URL your workflow will use once published.
This node must be used on your own cloud or on an N8N website
because Wawp cannot send to a local host link because it will consider it its own and thus the process will fail. You must have a link available for global access via the Internet to this webhook.
Step 2: Configure the Webhook in Your Wawp Account
Next, you need to tell your Wawp account where to send the event data.

- Log into your Wawp account dashboard and navigate to the Connected Numbers area.
- Click the Webhook button on your number’s instance card.
- In the popup, click Add New Webhook.
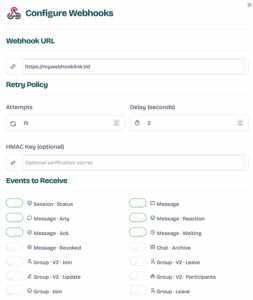
- Fill in the details:
- Webhook URL: Paste the
Production URLyou got from the Wawp Trigger node in n8n. - Retry Policy: Specify how often Wawp should retry sending the event if the connection fails (e.g., every 5 seconds).
- Events to Receive: Choose which events you want your workflow to listen for. You can select specific types like messages or reactions to avoid receiving unnecessary data.
The webhook URL must be globally accessible via the internet. Wawp cannot send events to a local host (localhost) link, so this feature works only with an n8n Cloud or self-hosted instance with a public URL.
Step 3: Test and Verify the Connection
Finally, it’s time to test if your workflow is successfully receiving events.
- Return to your n8n workflow and click Execute Workflow. This puts the node in a listening state.
- Using your phone, send a message to your Wawp-linked WhatsApp number.
- In n8n, you should see the node light up with a green success mark, indicating that an event was received.
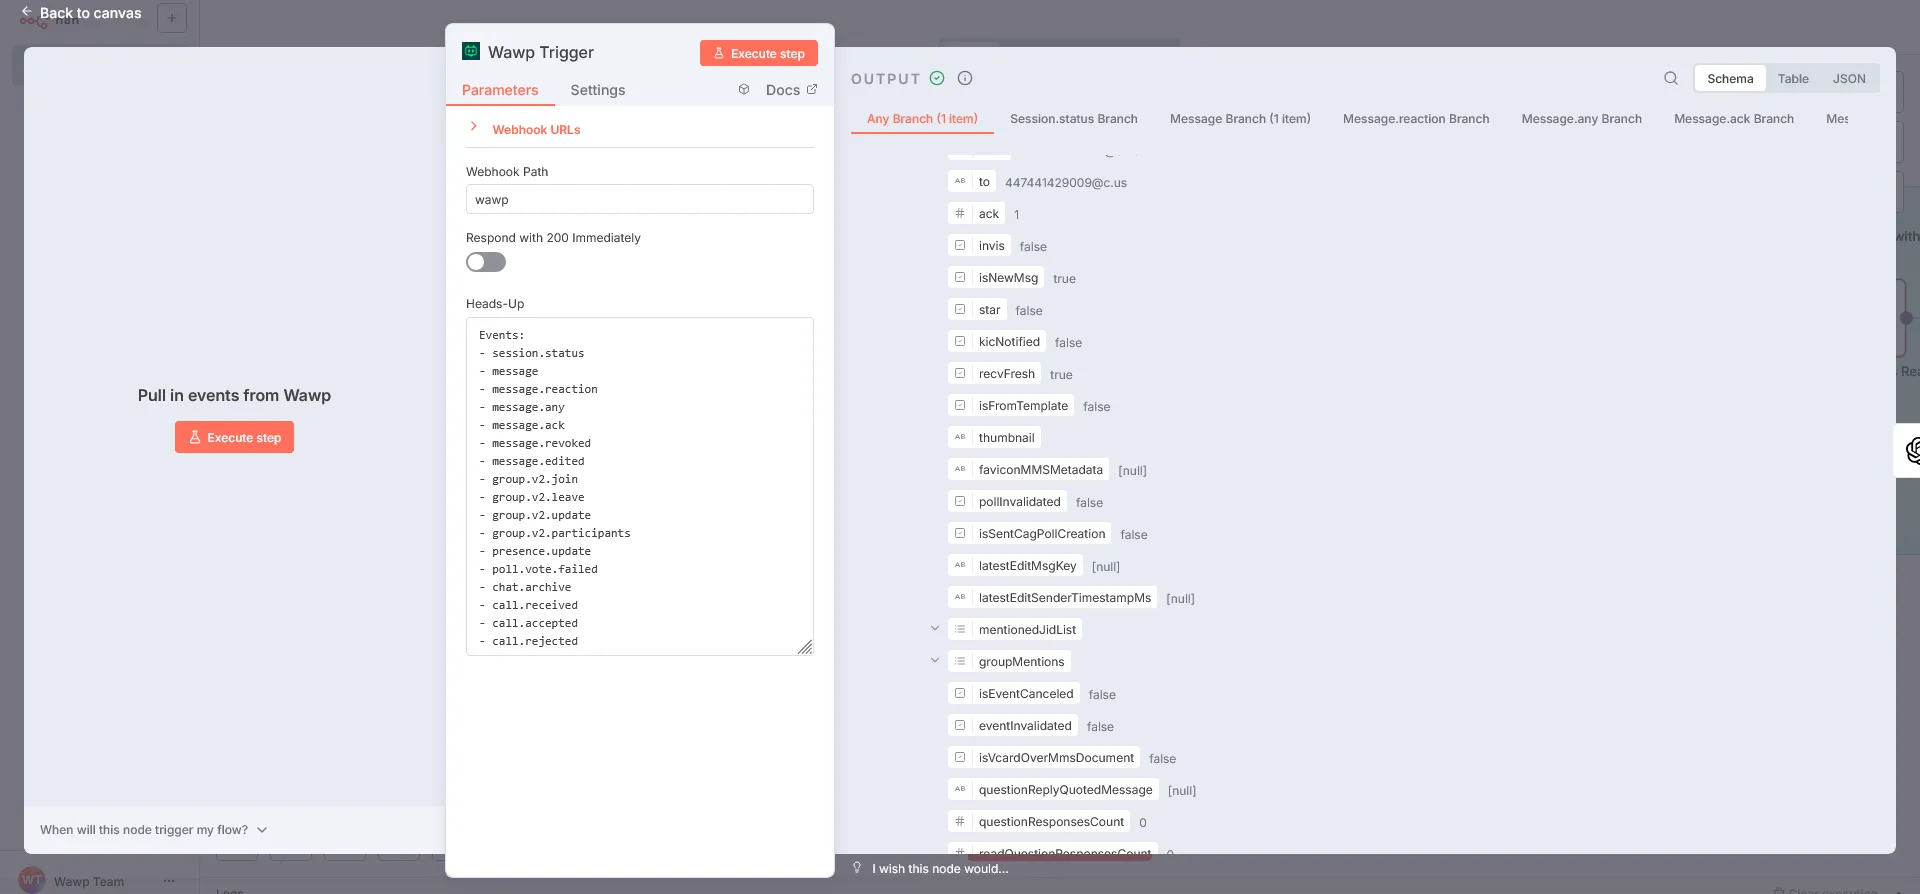
Now, open the node to inspect the data you got. The information you can receive includes everything from the message text to user details and media files. To get a full list of all possible fields, check out the Wawp API Docs.
If the webhook does not work for you, disable the option Respond 200.
The Power of the Wawp Trigger
The Wawp Trigger is designed as a powerful multi-output switch. It allows you to create a single, comprehensive workflow that handles different event types without needing multiple webhooks. It has one default “any” output and dedicated outputs for each event type (e.g., message, group.v2.join). This simplifies your automation, reduces complexity, and makes your workflows more efficient.