How to Setup SMTP Email
Configure custom SMTP settings to guarantee email delivery, manage multiple mail servers, and bypass standard hosting restrictions.
10 min read·Updated August 23, 2026

DELIVERY OPTIMIZATIONBUSINESS IMPACT & ROI
99.5% Inbox Deliverability: Bypassing default PHP webmail blocks and routing transactions through custom SMTP raises inbox placement to 99.5%, completely preventing invoice receipts and magic links from routing to the Spam folder. Instant Transaction Validation: Outbound mail server integrations deliver security validation PINs and WooCommerce invoices in under 3 seconds, preventing checkout customer churn by 15% caused by delayed mail dispatches.
Delivery Bottleneck Notice
Sending emails from WordPress using the default PHP wp_mail() or PHPMailer functions is highly prone to delivery failure. Default server configurations are frequently blocked or restricted by hosting providers to prevent spam, resulting in transactional emails, dual-factor authentication OTP codes, and WooCommerce receipts routing directly to recipients' spam folders or failing to send.
Activating and configuring custom SMTP (Simple Mail Transfer Protocol) settings ensures that all system-generated emails are routed through a trusted mail server, maximizing deliverability and brand reputation.

The central panel listing all configured outgoing email servers, statuses, and default settings.
Keywords: smtp accounts table, outgoing mail server, set default smtpThe SMTP Accounts dashboard under Wawp > Senders > SMTP Mail Server allows managing multiple outgoing email server configurations within a single workspace.
1. Default Sender Switching
- ✓ Selected (Active Badge): Indicates the server configuration that is currently assigned as the default outbound mailer.
- Set Default (Action Button): Toggles a selected mail server as the global default outbound sender. When clicked, Wawp updates the database routing to process all subsequent system dispatches through this profile.
2. Account Name & Details
- Displays your custom friendly name for identification.
- Underneath the friendly name, Custom SMTP connections display the outgoing host address and port in monospace font (e.g.,
smtp.gmail.com:587).
3. Provider Type
- Shows the detected provider name along with its brand logo (e.g., Gmail, SendGrid, Zoho, Hostinger, WordPress).
4. Server Status
- ✓ Active (Green Check): The server has successfully passed connection handshake validation.
- ◷ Pending Setup (Amber Clock): The server configuration has been entered but has not completed diagnostic validation.
5. Row Actions
- Edit & Test: Launches the 3-Step Setup Sheet Wizard with all previously saved configurations populated.
- Delete (Trash Icon): Removes the SMTP account profile from the database. A confirmation dialog appears to prevent accidental deletions.
The 3-Step Setup Sheet Wizard
Adding a new mail server or editing an existing one opens a slide-out setup sheet that guides you through three distinct linear steps:
Step 1: Choose Delivery Method & Management

Select whether to send via the local WordPress PHPMailer or a custom SMTP email provider.
Keywords: delivery method, select mailer, wordpress phpmail, custom smtp- Provider Selection: Select your mailer method:
- WordPress (PHPMailer): Uses your web server's native PHP mail configuration. Simple but susceptible to hosting provider limits.
- Custom SMTP: Outsources delivery to any professional third-party email provider or private mail server.
- Account Friendly Name: Enter an identifier (e.g., "Sales Support SMTP", "Transaction Alerts"). Wawp automatically pre-populates this field with
{ProviderName} Senderuntil manually adjusted.

Enter a friendly custom name to distinguish between supporting email channels inside your dashboard.
Keywords: account friendly name, connection identifier, supports labelsStep 2: Configuration Credentials & Presets
This step configures connection endpoints, access privileges, and public headers.
1. Quick-Fill Provider Presets (Custom SMTP Only)
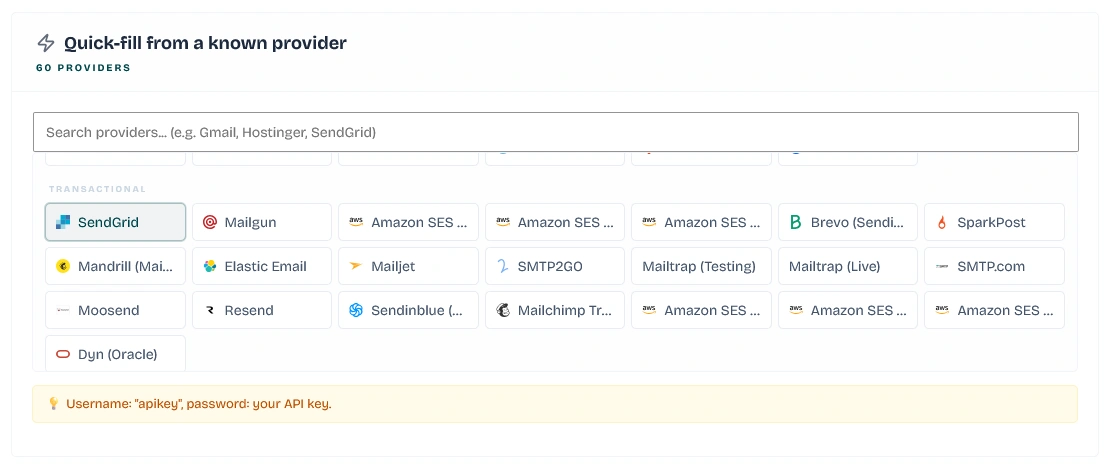
Search and click provider presets to automatically configure hostnames, ports, and encryption type.
Keywords: smtp provider presets, quick fill host details, gmail hostinger settingsWawp includes a searchable directory of verified SMTP providers. Typing your provider's name (e.g., Gmail, Hostinger, SendGrid) filters the directory:
- Categories: Presets are structured into Popular, Transactional, Hosting, Enterprise, and Regional / ISP.
- Auto-Fill Functionality: Clicking a provider button automatically inputs the correct Host, Port, Encryption type (SSL/TLS/None), and Authentication settings.
- Context Hints: A lightbulb notice displays specific configuration instructions for the selected preset (e.g., instructions on generating App Passwords).
2. Connection Credentials Form
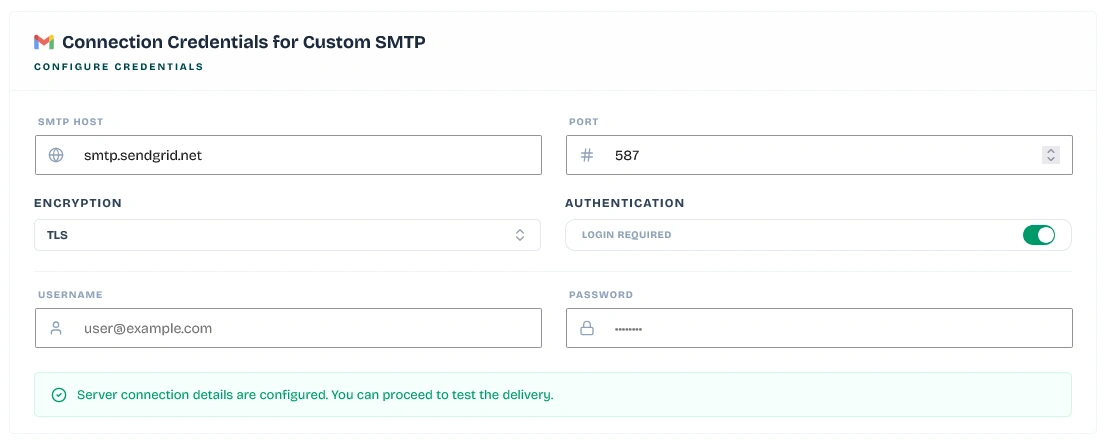
Enter your mail server hostname, port, encryption protocol (SSL/TLS), and access authentication credentials.
Keywords: smtp host, login credentials, usernames passwords settings- SMTP Host: The outgoing mail server address.
- Port: The port matching your provider's protocol (e.g.,
587for TLS,465for SSL,25or2525). - Encryption: Select from None, SSL, or TLS protocols.
- Authentication: A toggle switch to require login credentials:
- Username: The verified mailbox email address or designated API username.
- Password: The password, API secret key, or secure App Password.
- System Integration Status: For the WordPress mailer option, Wawp displays a blue informational card indicating that the plugin will hook directly into your local PHP configuration.
3. Public Identity

Configure outbound email headers including From Email address and From Name visible in recipient inboxes.
Keywords: from email header, from name label, email display properties- From Email: The verified email address visible as the sender of outgoing mail.
- From Name: The display name shown in user inboxes (e.g., "Wawp Customer Service").
Step 3: Diagnostic Check (Testing)
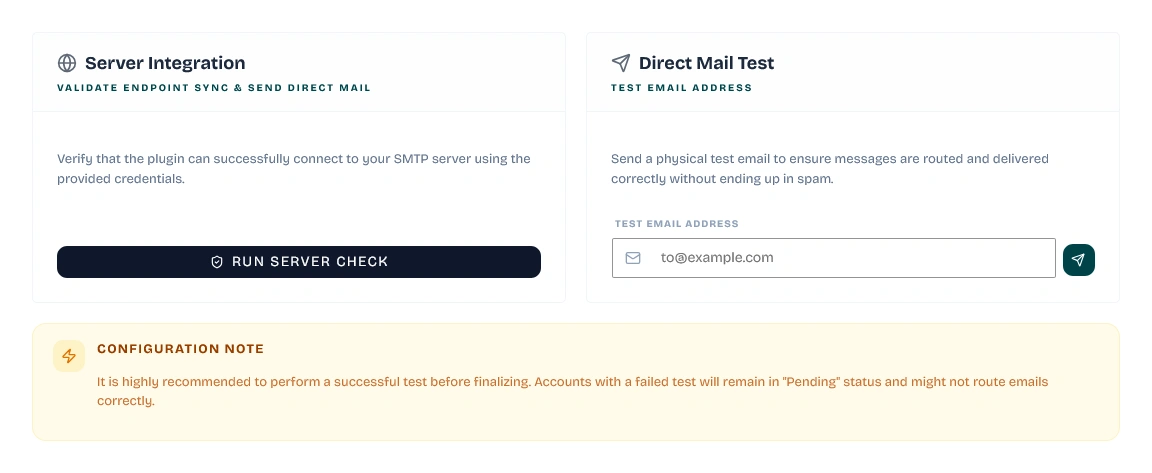
Run real-time API socket verifications and send test emails to guarantee delivery configurations.
Keywords: smtp testing checks, verify server integration, dispatch test payloadBefore finalizing configurations, perform diagnostic checks to verify routing settings. Wawp separates these tests into two dedicated cards:
- Server Integration (Verification Check): Clicking Run Server Check initiates a connection handshake between your WordPress server and your SMTP provider using backend REST validator APIs. This verifies that security certificates and ports are open and responding.
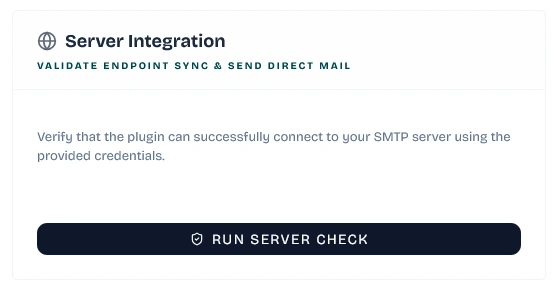
Socket check to verify TLS handshakes, certificate bindings, and port access.
Keywords: rest connection handshake, server check, socket validator check- Direct Mail Test (Outbound Delivery): Input a recipient address and click the Send button. Wawp dispatches a physical diagnostic email to verify that incoming emails bypass spam filters and deliver successfully.
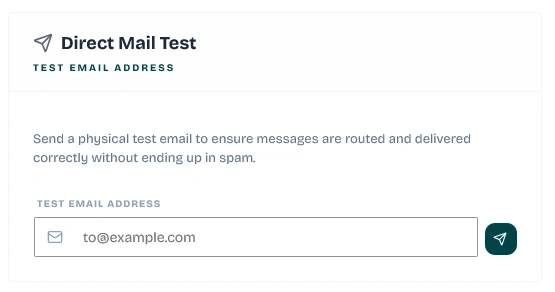
Send test payloads directly to recipient addresses to verify inbox delivery.
Keywords: test mailer dispatch, direct test delivery, mail test success checkConfiguration Warnings Successful completion of a diagnostic check is required. Accounts with failed connections remain in Pending Setup status and will not route system emails correctly. Performing a successful connection handshake and sending a diagnostic test email is highly recommended before setting the account live.
Retrieving SMTP Details from Hosting Panels
If you are using email accounts hosted on your own server, you can find the custom SMTP credentials directly in your hosting dashboard:
1. cPanel

Locate secure SSL/TLS server settings in cPanel email accounts dashboard.
Keywords: cpanel mail setting, secure incoming ssl, outgoing hostname- Log in to your hosting cPanel dashboard.
- Under the Email section, click on Email Accounts.
- Locate the email address you wish to connect and click the Connect Devices button next to it.
- Locate the Secure SSL/TLS Settings (Recommended) section.
- Copy the following parameters into the Wawp setup sheet:
- SMTP Host: Use the hostname shown under Outgoing Server (usually
mail.yourdomain.com). - Port: Use
465(SSL) or587(TLS). - Username: Your full email address (e.g.,
user@yourdomain.com). - Password: The password designated for that specific email mailbox.
- SMTP Host: Use the hostname shown under Outgoing Server (usually
2. aaPanel
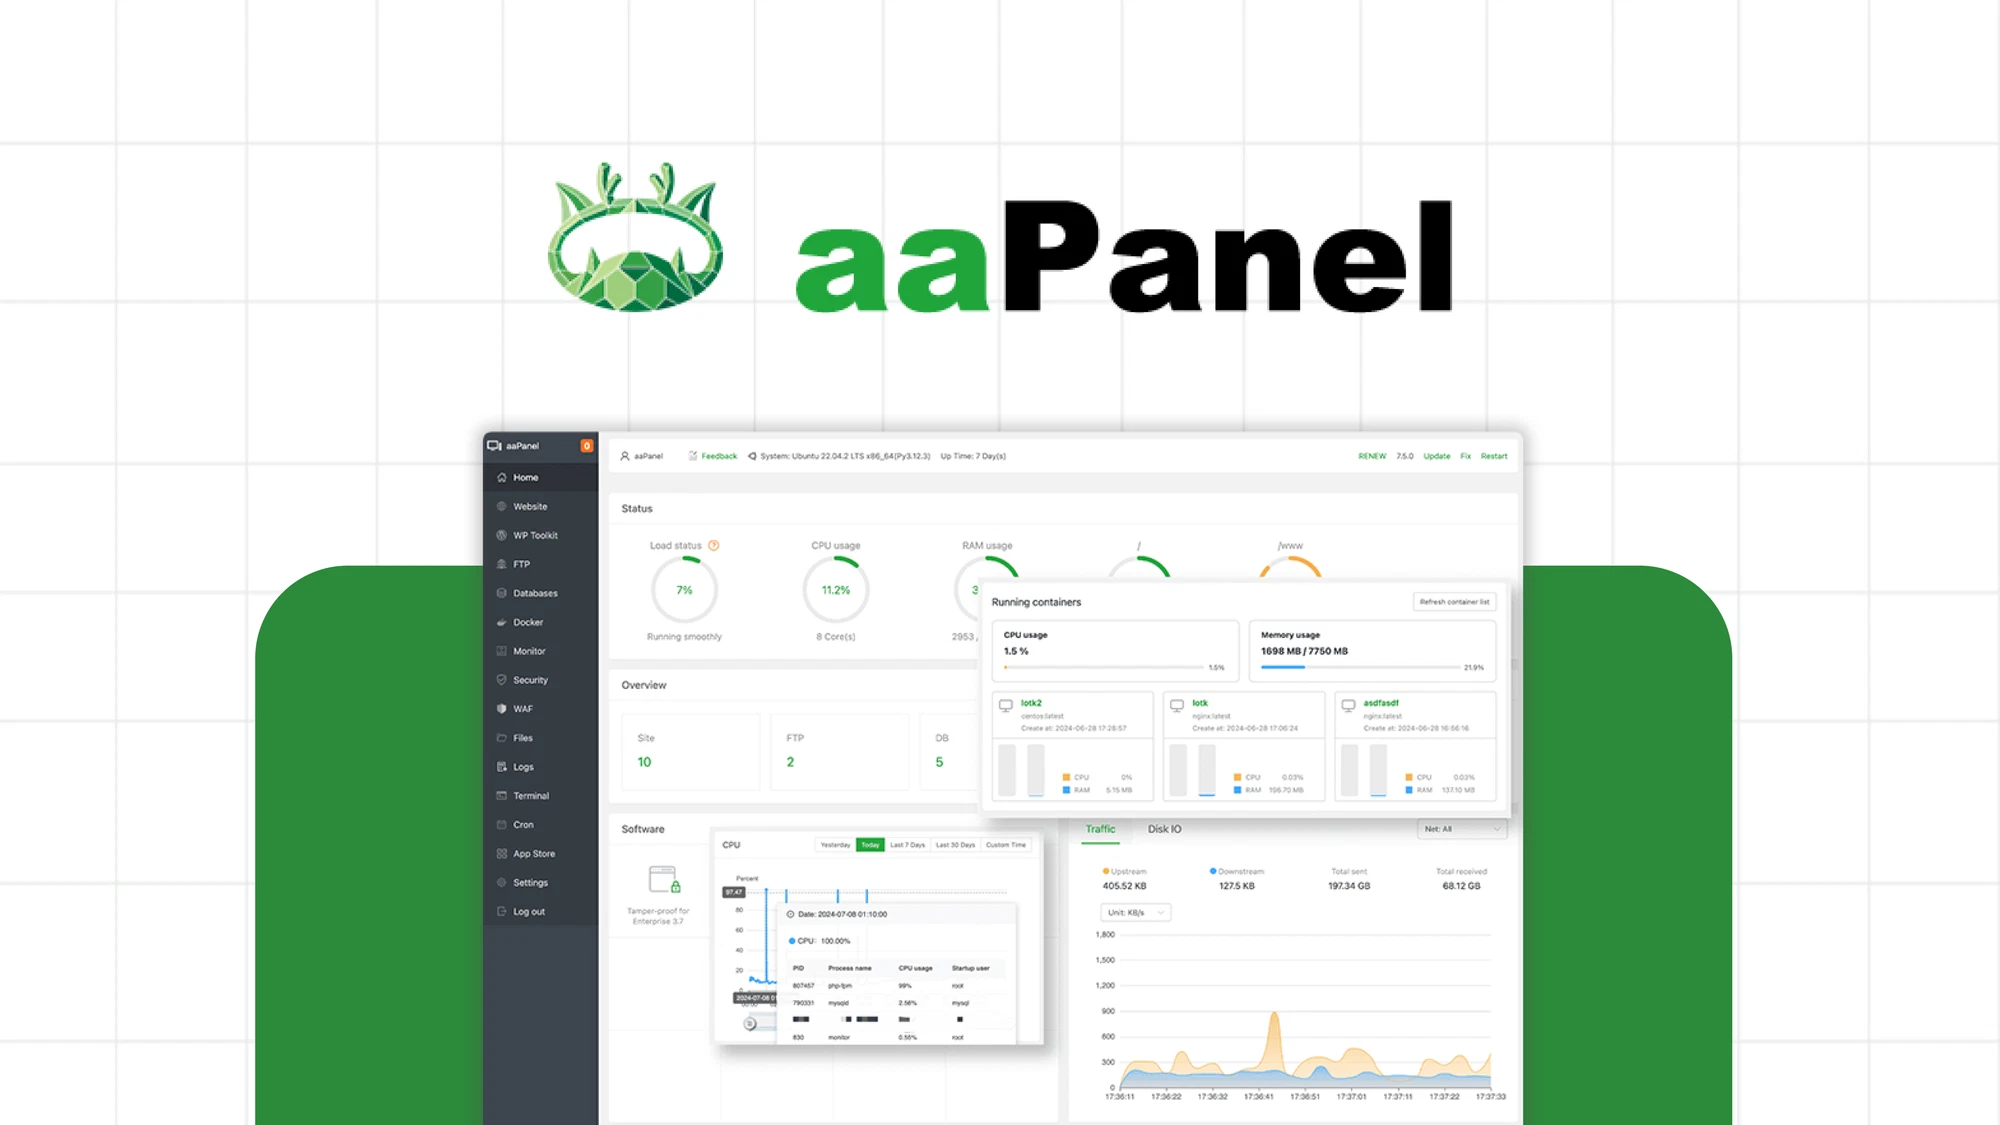
Setup aaPanel Mail Server plugin domains, verify SSL certifications, and copy credentials.
Keywords: aapanel mail server, hostname settings ssl, mailbox credentials- Log in to your aaPanel admin panel.
- Select App Store or Mail Server from the navigation menu (ensure the official Mail Server plugin is installed).
- In the Mail Server settings, click on Domains to ensure your custom hostname (e.g.,
mail.yourdomain.com) is correctly mapped with a valid SSL/TLS certificate. - Under the Emails tab, verify the mailbox credentials.
- In Wawp, use the following configuration:
- SMTP Host: Your aaPanel Mail Server domain (e.g.,
mail.yourdomain.com). - Port: Use
465with SSL encryption, or587with TLS encryption. - Username: The full email address created in aaPanel.
- Password: The password you designated during aaPanel mailbox creation.
- SMTP Host: Your aaPanel Mail Server domain (e.g.,
3. Plesk

Retrieve secure outbound parameters from the Plesk email configuration panel.
Keywords: plesk manual configuration, mail connection, plesk hostnames ports- Log in to your Plesk server control panel.
- Navigate to the Mail page and click on the Mail Accounts tab.
- Select your email address and click on the information icon next to it or locate Manual Setup connection details.
- Retrieve the secure connection parameters:
- SMTP Host: The mail server host provided by Plesk (usually
mail.yourdomain.comor the Plesk server domain). - Port: Use
465(SSL/TLS) or587(STARTTLS). - Username: Your complete email address.
- Password: Your email mailbox password.
- SMTP Host: The mail server host provided by Plesk (usually
4. CyberPanel

Verify issued MailServer SSL keys and find CyberPanel SMTP details.
Keywords: cyberpanel mail ssl, cyberpanel mail domains, smtp usernames passwords- Log in to your CyberPanel control panel.
- Click on Email in the sidebar, then select List Emails.
- Locate the email account to view its details.
- Note: Go to SSL > MailServer SSL from the sidebar and verify that SSL is issued for
mail.yourdomain.comto prevent connection handshake failures. - In Wawp, use the following details:
- SMTP Host:
mail.yourdomain.com - Port: Use
465(SSL) or587(TLS). - Username: The full email address.
- Password: The email mailbox password.
- SMTP Host:
Expert Settings & Troubleshooting
1. Google Workspace & Gmail

Generate unique 16-character App Passwords to bypass Gmail security controls.
Keywords: gmail app password, workspace smtp authentication, google security keysGoogle App Password Requirement Standard Google account passwords will fail due to Google security policies. You must enable Two-Factor Authentication (2FA) in your Google Account Security settings, then generate a unique 16-character App Password to paste into Wawp's password field.
- SMTP Host:
smtp.gmail.comusing Port587(TLS) or Port465(SSL).
2. Microsoft 365 & Outlook

Enable Authenticated SMTP in the Microsoft Admin Center under Active Users settings.
Keywords: microsoft authenticated smtp, outlook corporate mailer, office 365 smtp credentials- SMTP Host:
smtp.office365.comusing Port587(TLS). - Mailbox Configuration: Ensure "Authenticated SMTP" is explicitly enabled for the specific user account inside the Microsoft 365 Admin Center (under Active Users > Mail > Email Apps).
3. Transactional API Credentials
- SendGrid: Host is
smtp.sendgrid.neton Port587(TLS). Username must be the literal stringapikey, and Password is the generated API Key. - Brevo (Sendinblue): Host is
smtp-relay.brevo.comon Port587(TLS). Username is your registered account email, and Password is the SMTP API Key. - Mailgun: Host is
smtp.mailgun.org(US domains) orsmtp.eu.mailgun.org(EU domains) on Port587(TLS). Username is the specific SMTP credential name, and Password is the SMTP password. - Resend: Host is
smtp.resend.comon Port465(SSL). Username must be the literal stringresend, and Password is the API Key.
4. Shared Hosting Port Restrictions
Port 25 Restriction Warning Many shared hosting providers (such as Bluehost, Hostgator, GoDaddy) block outbound communication on Port 25 by default to prevent spam. Ensure you use Port 587 (TLS) or Port 465 (SSL) to prevent outbound socket timeouts.
5. Unsaved Changes Guard
Wawp includes a built-in safety listener. If you make modifications in the setup sheet but attempt to reload the browser or navigate away without clicking Save, Wawp prevents the action to protect your credentials.
Did this page help you?
100% found this article helpful (0 likes)
Related Articles
Wawp Sender Settings Tutorial
In this article, we will review the Sender Settings so that you can send via WhatsApp, email, etc.
How to setup Whatsapp Meta API
Integrate your WordPress site directly with official Meta Cloud API to achieve high-reliability broadcast capabilities.
How to Connect WhatsApp Web
Learn how to link your regular or Business WhatsApp number to Wawp using a QR code, an OTP link code, or manual credentials, and follow best practices to avoid bans.
- Need help? Contact Support.
- Check out our Changelog.
- Join our Facebook Community.
- LLM? Read llms.txt.
OFFER ENDS SOON
Extra 30% OFF All Plans
Use this exclusive promo code at checkout to enjoy an extra 30% discount on top of current sales!
BOOST30